Adding your online store to WordPress site
WordPress is a popular content management system that allows you to create websites and blogs. You can easily add an online store to your WordPress site with a help of a plugin. Please, contact us to get the plugin.
Once installed, the plugin automatically creates a Store page where your customers can shop with you. You can set up and manage your online store right from your WordPress back-end. The store admin area is built in there, so you can manage your entire e-commerce website from one place.
Adding online store to WordPress.org
If you run your website or blog on the self-hosted WordPress.org platform, you can easily add your online store to it using a plugin.
To add your online store to a WordPress site:
- Contact us to get the plugin for your online store.
- Install the plugin to your WordPress site. The installation may take several seconds.
- Click Activate.
You can access your store admin either directly or right in your WordPress back-end:
- In WordPress.org, click on your installed online store plugin in the menu on the left.
- Go to the necessary section of your store admin, for example:
- Storefront — this section gathers in one place lots of settings that are specific to WordPress. Here you can manage the way your store appears on your WordPress site, like edit your store design, add the store to the home page, display the cart icon in your site’s header and many others.
- Catalog → Products — here you can remove sample products and add your own products.
- Payment — in this section you can set up the payment options that you’d like to offer to your customers at checkout.
Showing categories on different site pages
You can add products from different products on sale or you sell clothes for men and women and you want to display all these products on separate website pages.
When you add a store category to a separate website page, the link to this page appears on the website menu. This provides more chances to attract customers’ attention as the designated category is visible from any website page.
To add a category of products to a separate page on the WordPress website:
- From your WordPress dashboard, go to your online store → Storefront.
- In the Add a category page section, click Pick Category and choose a category you want to show on the page.
- If necessary, customize this category’s design (these changes won’t affect other categories) – select the block with the store category to see its settings and choose from the design options in the Block on the right:
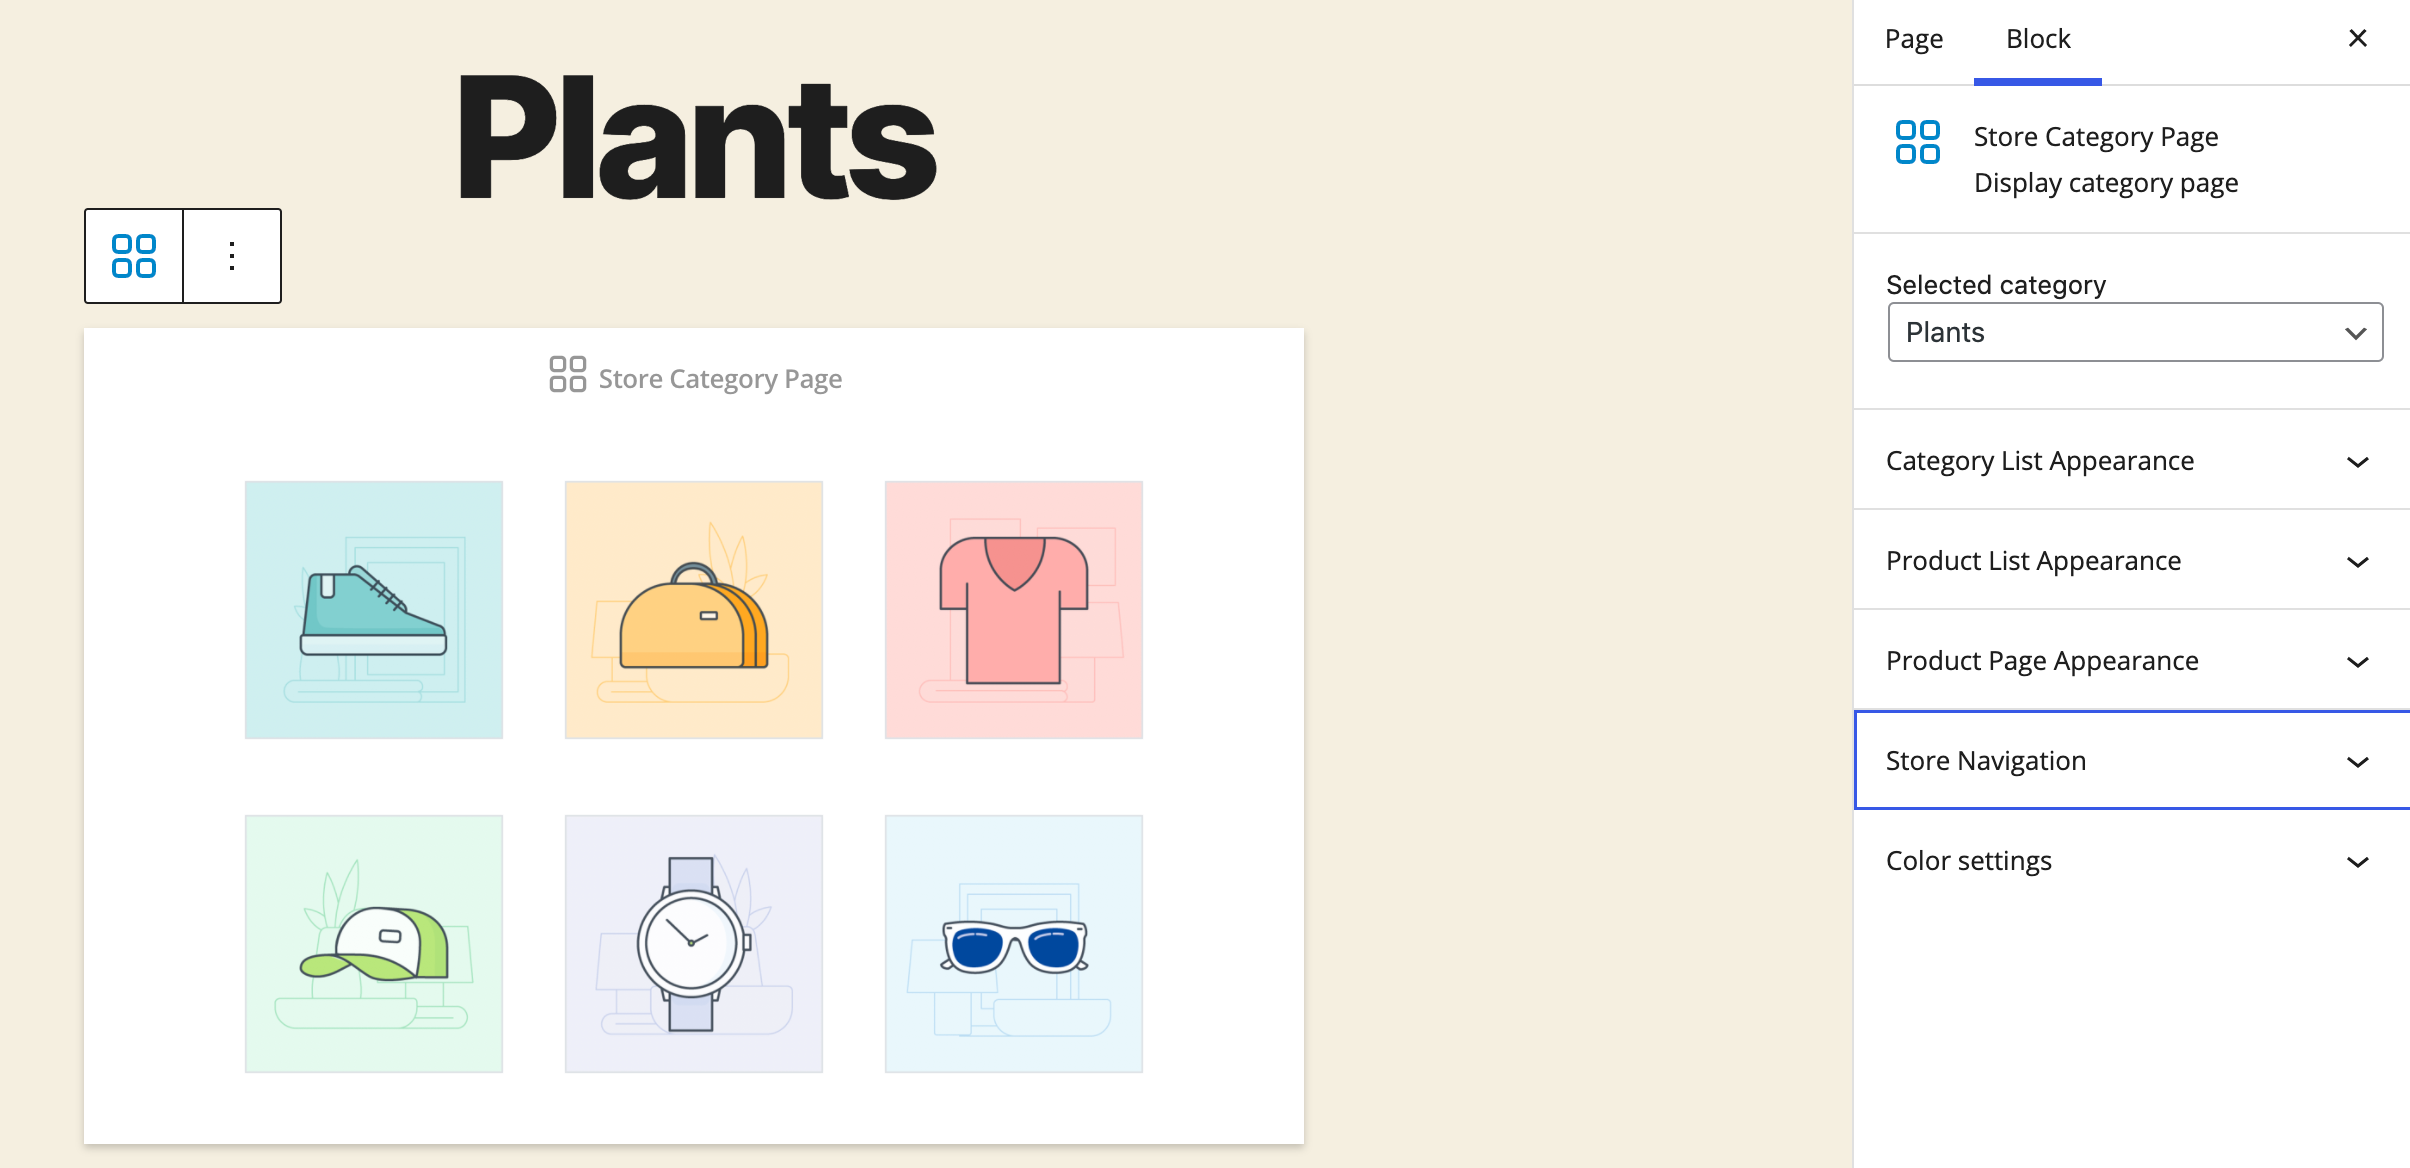
- Click Publish when you are satisfied with the result.
- Repeat the above steps with other categories.
That’s it, you have added your store categories to different website pages and your customers can access them from your site menu.
Featuring one product on a page
You can add one product from your online store to any website page. For example, you can create a landing page for a new product or highlight a non-selling product in a post to stimulate sales.
To add one product to a page on the WordPress website:
- Go to your WordPress Dashboard → Pages and open the page where you want to add a product. You can add it to a new or existing page.
- Click the + button in the upper left to add new block.
- Depending on how you want to represent a product, click on the appropriate block: Product Card Large (it includes product description and gallery), Product Card Small or Buy Button.

- If you want to modify the appearance of the product card, click on the block with the product and change the block settings on the right:
- Click Update to save the page changes.
Alternatively, you can create a product landing page from your WordPress admin panel → your online store plugin → Storefront. Click Add a product page and select the product you want to highlight.
Featuring products with widgets
You can promote products from your online store on your WordPress website by using widgets. There are three types of widgets to choose from:
- Recently viewed products
- Latest added products
- Random product.
When activating a widget, you can also choose where to show it on your website so depending on your design theme, you can show products in a sidebar, footer, or other and thus attract more customers’ attention to your products.
To feature products on your website:
- Go to the WordPress admin panel → Appearance → Widgets.
- Click on online store widgets that you want to use to show products:
- Recently viewed products
- Latest added products
- Random product.
- Select where to display the widget.
- Click Add Widget.
In addition to products, you can also add other store widgets on this page:
- Shopping cart
- Product search
- Store root categories
- Store page link
After you add any of these widgets, check to make sure they fit with your site’s design.
Adding store search
You can add a product search box to any page on your WordPress website:
- Go to WordPress Dashboard → Pages and open the page where you want to add the search.
- Click Add block → Product Search Box.
- Save the changes.
If you have a large product catalog and use filters to help your customers find a product, you can add a search page to your site — it will contain the product search box, product filters, and your product list.
To add a search page:
- From your WordPress admin panel, click on your installed online store plugin in the menu on the left → Storefront.
- In the Add a search and filters page section, click Create Search Page.
Adding drop-down menu with categories
If products in your store are divided into categories, you can show store categories in the drop-down of the website menu. This will improve your website navigation and will help customers find products faster.

As you add new root categories to the store, they will be automatically added to this menu.
Here is how to add your store categories to the WordPress website menu:
- Go to the WordPress Dashboard → Appearance → Menus.
- Open the Store tab.
- Tick Store with Categories Menu:

- Click Add to menu.
- Click Save Menu.
If you added a new root category to the store and it doesn’t display in the menu, click Refresh categories list link in the WordPress admin panel → Appearance → Menus.
Also, in Appearance → Menus you can add other store links to your website menu:
- Cart: adds a link to the cart page
- Product Search: adds a link to a page with the search and filters
- My Account: adds a link to the customer store profile page
- Store: adds a link to the main store page
Select what links will be helpful for your customers and add them to the website menu.
Offering one login to site and store for customers
Most websites offer an option for users to create accounts. You can use it for different reasons: generate a list of customers, hide specific pages from unregistered users, etc.
Your online store also allows customers to create accounts and log in. In the store account, customers can see their order history and get discounts if they belong to customer groups among other options.
If you offer a login on the website and in the store, two login icons and dual login may confuse your customers. In this case, you can automatically log your customers in to the store when they log into your WordPress website. For this, you can turn on the Single Sign-On setting (SSO).
To enable the Single Sign-On option on your WordPress website:
- Go to WordPress Dashboard → in the menu on the left, click on your installed online store plugin → Advanced.
- Tick Customer Single Sign-On option.
- Click Save changes.
Including products into website sitemap
A sitemap helps search engines like Google, Bing, Yahoo to better index your site. It provides search bots with the complete structure of your site which allows for faster indexation. When your website and store pages are indexed, they appear in search results and help potential customers find your store.
To create a sitemap for your WordPress site and include product and category links, you can use one of the plugins:
Fully compatible with your online store, these plugins will add links to the product and category pages of your store to the generated sitemap. This way, search engines will be able to index your website pages along with the store pages.
FAQ
Can I add several stores to one WordPress website?
You can have two or more different online stores on the same WordPress website. Add one store with a plugin and add additional stores with a code. Don’t be afraid of the “code” word. It’s a ready code — you just need to copy and paste it.
You can also add different categories of the same store to different website pages.
To add the second store with a code:
- Go to your store admin → Website.
- Scroll down the page to see the Sell on your website section. Click on Other platforms and sitebuilders.
- Click Copy Code to Clipboard. Now you’ve got your store code.
- Go to the WordPress Dashboard → Pages and open the page where you want to display the store.
- Click Add Block → Custom HTML.
- Paste the copied code to the field.
- Save the changes.
You will see the store’s home page on the website. To add other stores to the website, follow the above steps for each store.
Make sure to add stores to separate pages – one store on a page. When two store codes are added to pages, only the first one will display on the page.
How can I connect another online store to my site?
In case you initially connected a wrong store account or just decided to put another store on the website, you can connect the plugin to another store anytime. Here is how to do it:
- Go to your WordPress Dashboard → in the menu on the left, click on the installed online store plugin.
- Scroll down to the bottom of the page.
- Click Reconnect in the bottom right corner.
- You will see the Connect Your Store button. Log into the admin panel of the store that you want to show on the website.
After you complete the steps, the new store will appear on your website.
Can I restrict access to the store admin panel to certain users?
You can restrict access to your store admin area in WordPress with the help of the User Role Editor plugin. Here’s what you need to do.
- Install the User Role Editor plugin to your WordPress admin panel.
- Go to the Users menu.
- Find the user you want to block from the store admin.
- Click the Capabilities link:

- Use the Quick filter field and find manage_options:

- Disable it and click Update.
- This person will not be able to access your online store backend when using your WordPress Dashboard.