Creating custom fields at checkout
Custom fields allow you to collect extra data like country-specific tax IDs, notes on how to fulfill orders, or any other information from your customers at checkout. You can add as many custom fields as you want to the standard one-page checkout in your store.
The information that your customers submit via custom checkout fields will appear in the order details and in admin order notifications. It can also appear in invoices and/or in your store’s customer notifications if you wish. You can make filling out the fields mandatory or voluntary for your customers.
Custom checkout fields let you collect information for the whole order. To gather information for individual items, like custom sizing, use product options instead.
Available field types
You can add the following custom field types to checkout:
- Text fields (single-line or paragraph)
- Radio buttons
- Dropdowns
- Date and time pickers
- Selection buttons
- Checkboxes
It’s up to you to choose which field type best suits the data that you want to collect. For example, you can use date and time pickers for calendars, text fields for delivery instructions or gift messages, and selection buttons for customer feedback surveys.
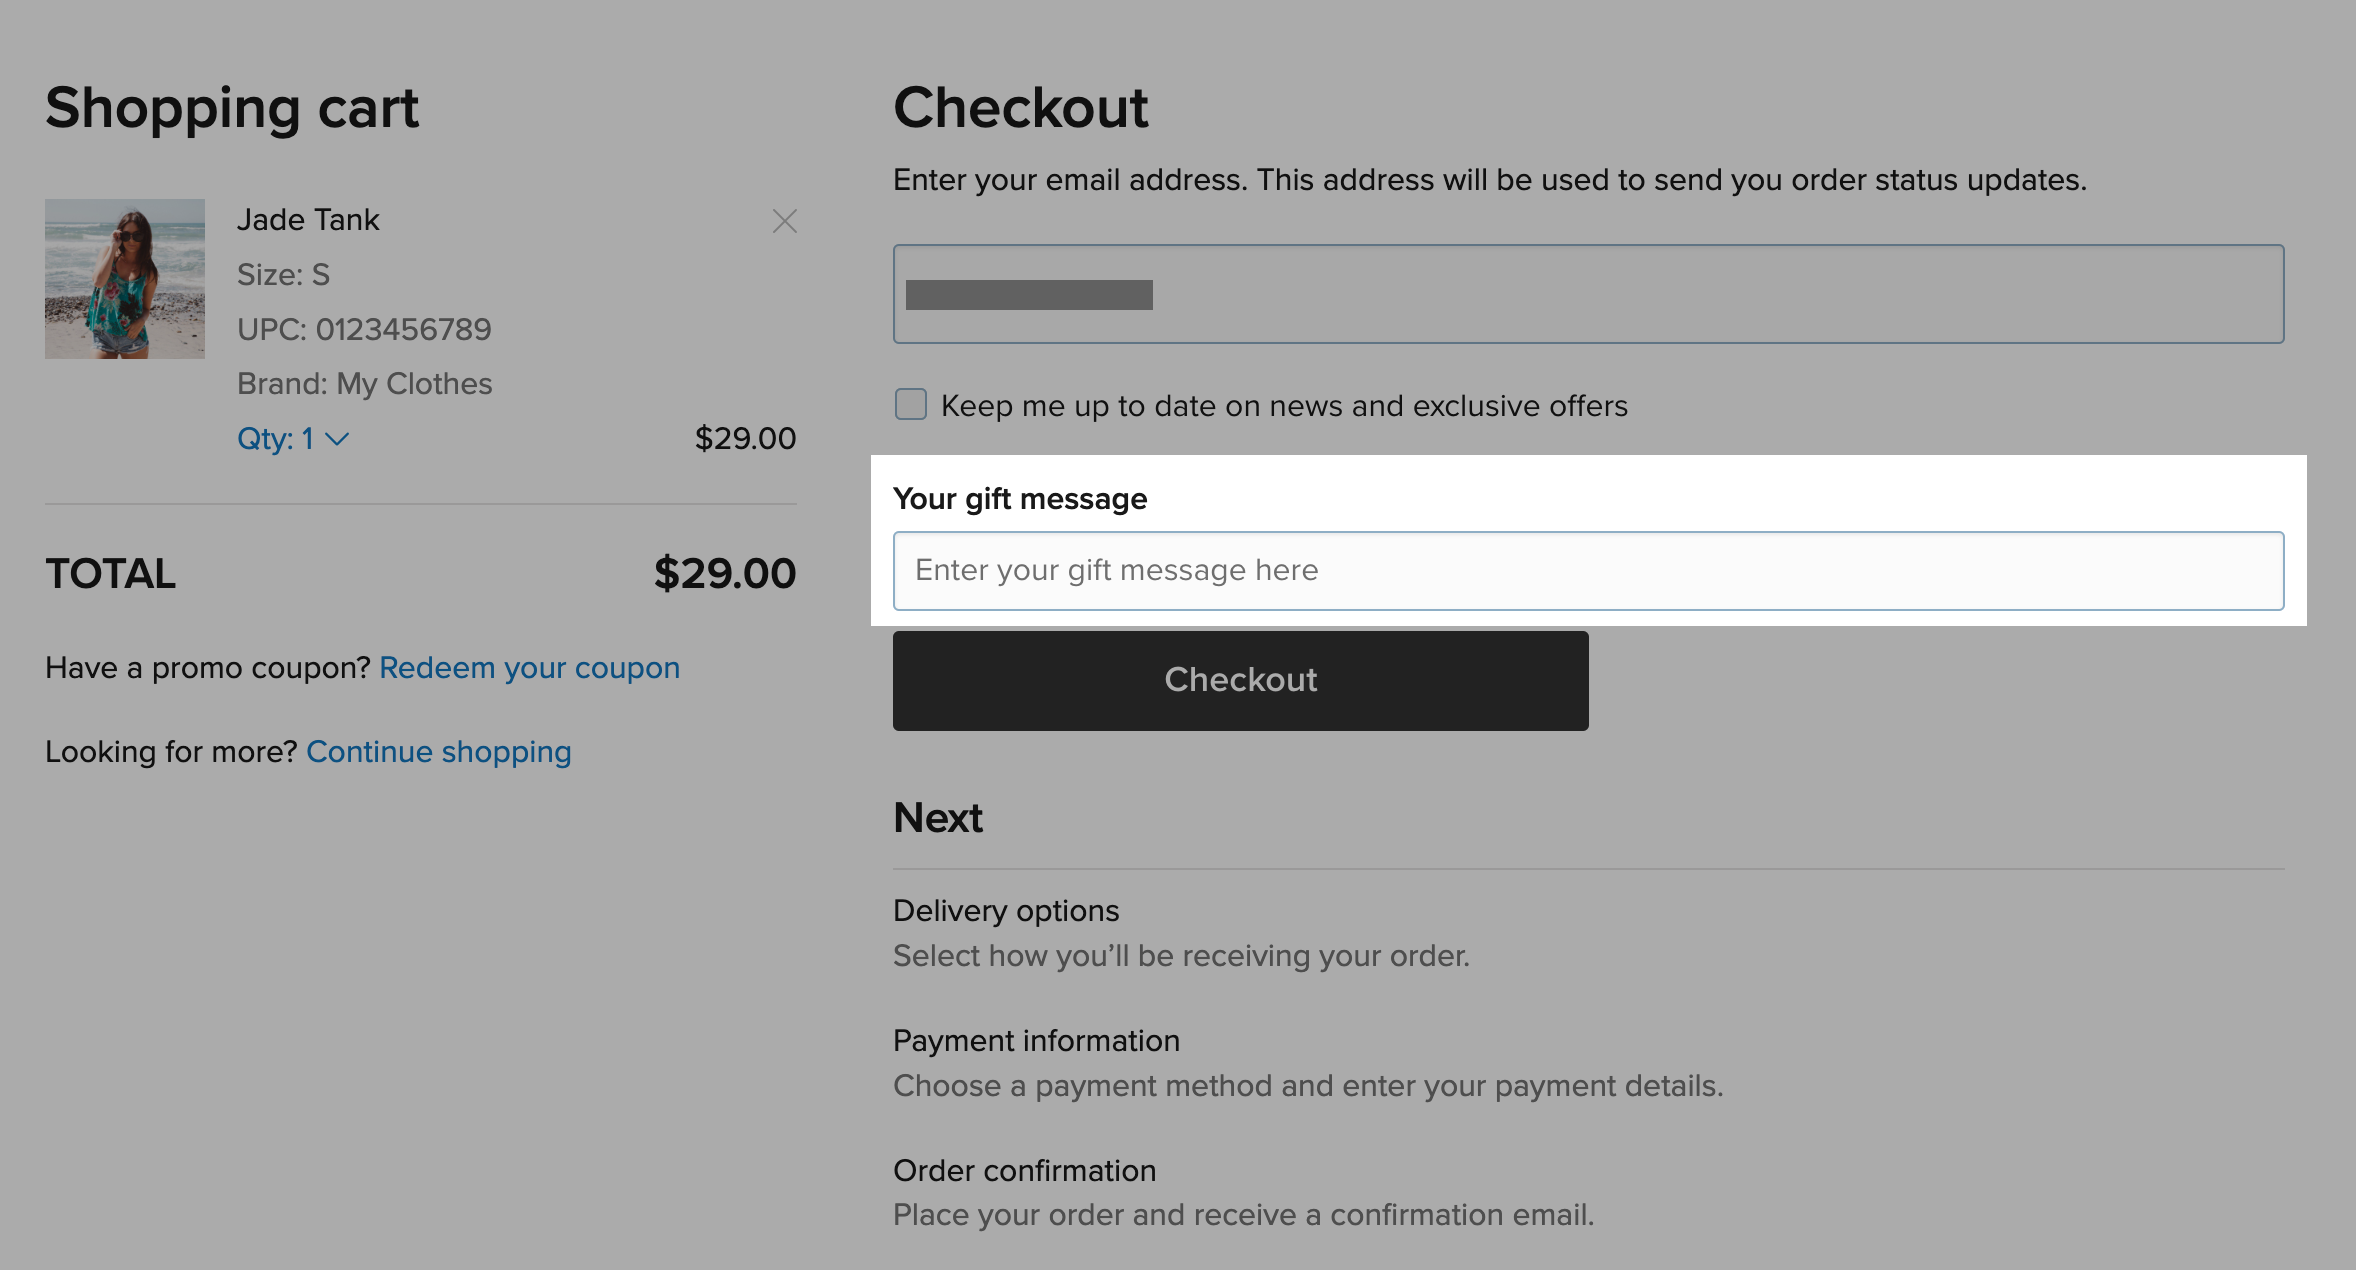
Example of a custom single-line text field
Adding custom fields to checkout
One-page checkout in your store includes entering email address, shipping address, and pickup details, as well as choosing shipping methods, pickup methods, and payment options. You can add an unlimited amount of custom fields to any of the checkout steps except for the final “Thank you for your order” page.
To add a custom field to checkout:
- From your store admin, go to Settings → General → Cart & Checkout.
- Scroll down to the Custom checkout fields block, then click Add Custom Fields. On the opened page, click + Add Field.
- Select the custom field type. Preview appears on the right:
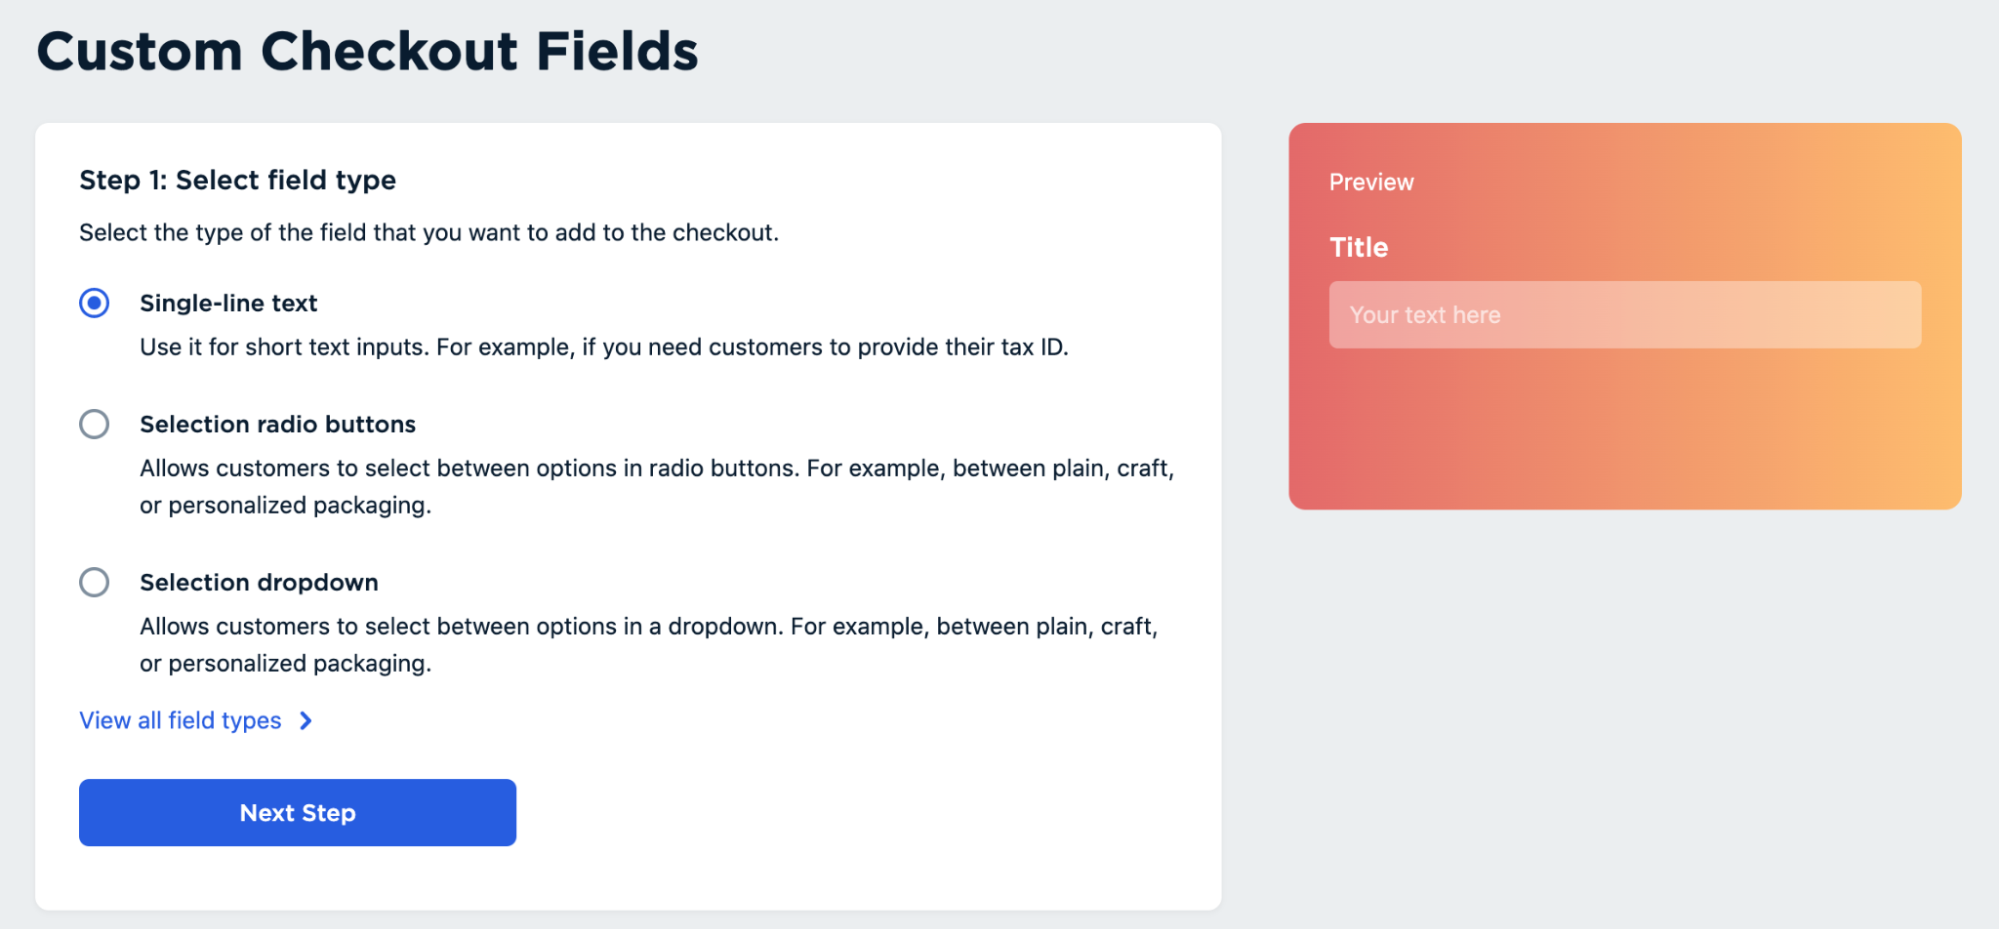
- Click Next Step.
- Name the field to let customers know what it is about (e.g., “Your dimensions”) and add other field content according to its type. For fields with options, you can mark the option that will be selected by default as well as add surcharges. For example, you can charge different amounts of extra money for different types of packaging.
- Click Next Step.
- From the Select checkout step for field display dropdown, choose the checkout step where you want this custom field to appear.
- Enable the Required field toggle if you want customers to fill out the field/choose an option before they can proceed with checkout.
- Click Limit field display at checkout if you want to make this field available only to part of your customers. Limitations are available based on country, shipping method, or payment method.
- Click Set up field display after order placement to change where the field data is displayed in the order details and enable the Show field in invoices and/or Show field in customer emails toggles if you want.
- Click Create and Display at Checkout to publish the field, or click Create Without Display to finish creating the field without making it available for customers at checkout. You can enable or disable fields later.
That’s it! You’ve added a custom field to your store.
Enabling, disabling, and deleting custom fields
You can enable, disable, or permanently delete custom fields that you have in your store. If you disable a field, it will no longer be displayed at checkout. You can enable the field back when you need it.
To manage custom fields:
- Go to Settings → General → Cart & Checkout → Custom checkout fields, then click Add Custom Fields. On the opened page, you will see a list of custom fields that you’ve created.
- To enable or disable a specific field at checkout, switch the toggle next to it:

- To delete the field completely, click Actions → Delete → Yes.
Currently, it’s not possible to view or edit the contents of your custom fields after creating them. This functionality is coming in the following store updates. To check how your custom field works at checkout, enable this field, and place a test order.
Sorting custom fields
If you add more than one custom field to any of the checkout steps, you can change the order in which the fields appear at this step. Sorting the fields helps position them in a way that best suits your needs. For example, you can place mandatory fields first.
To sort custom fields:
- Go to Settings → General → Cart & Checkout → Custom checkout fields, then click Add Custom Fields.
- Click Actions → Sort for any of the fields. On the opened page, you will see a list of all the custom fields that exist in your store grouped according to their checkout step.
- Drag and drop the fields so that they appear in the order you need:
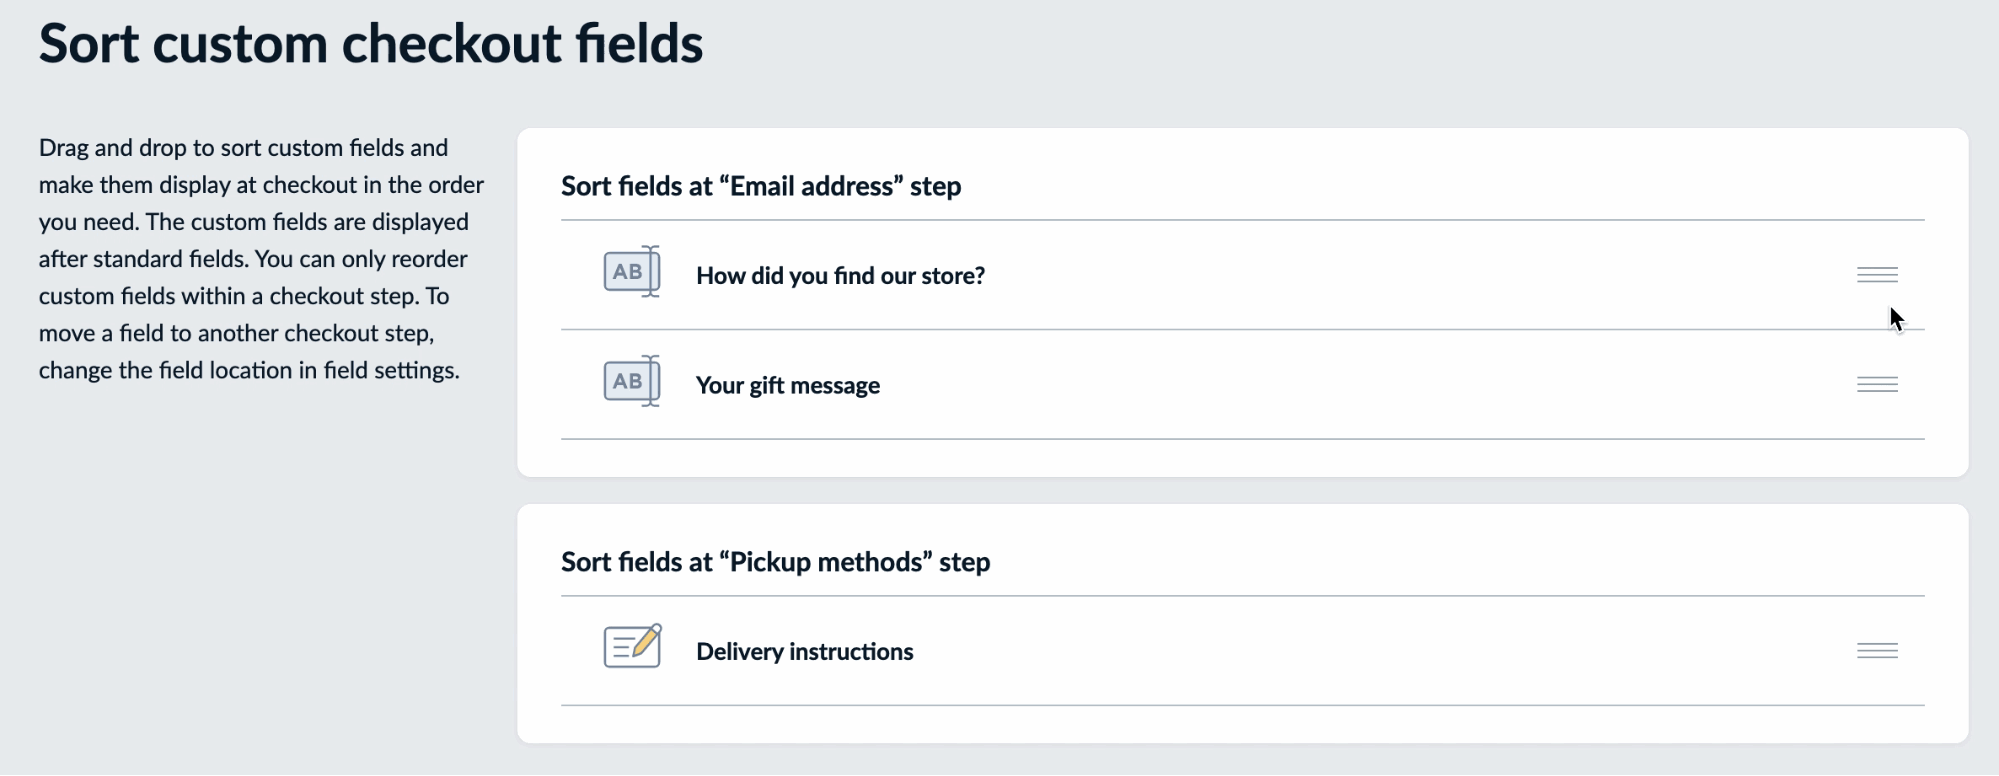
Changes are saved automatically.
The custom field order that you set will also be used in the order details as well as in your store’s notifications and invoices (if you chose to show the fields there).
Accessing custom field data
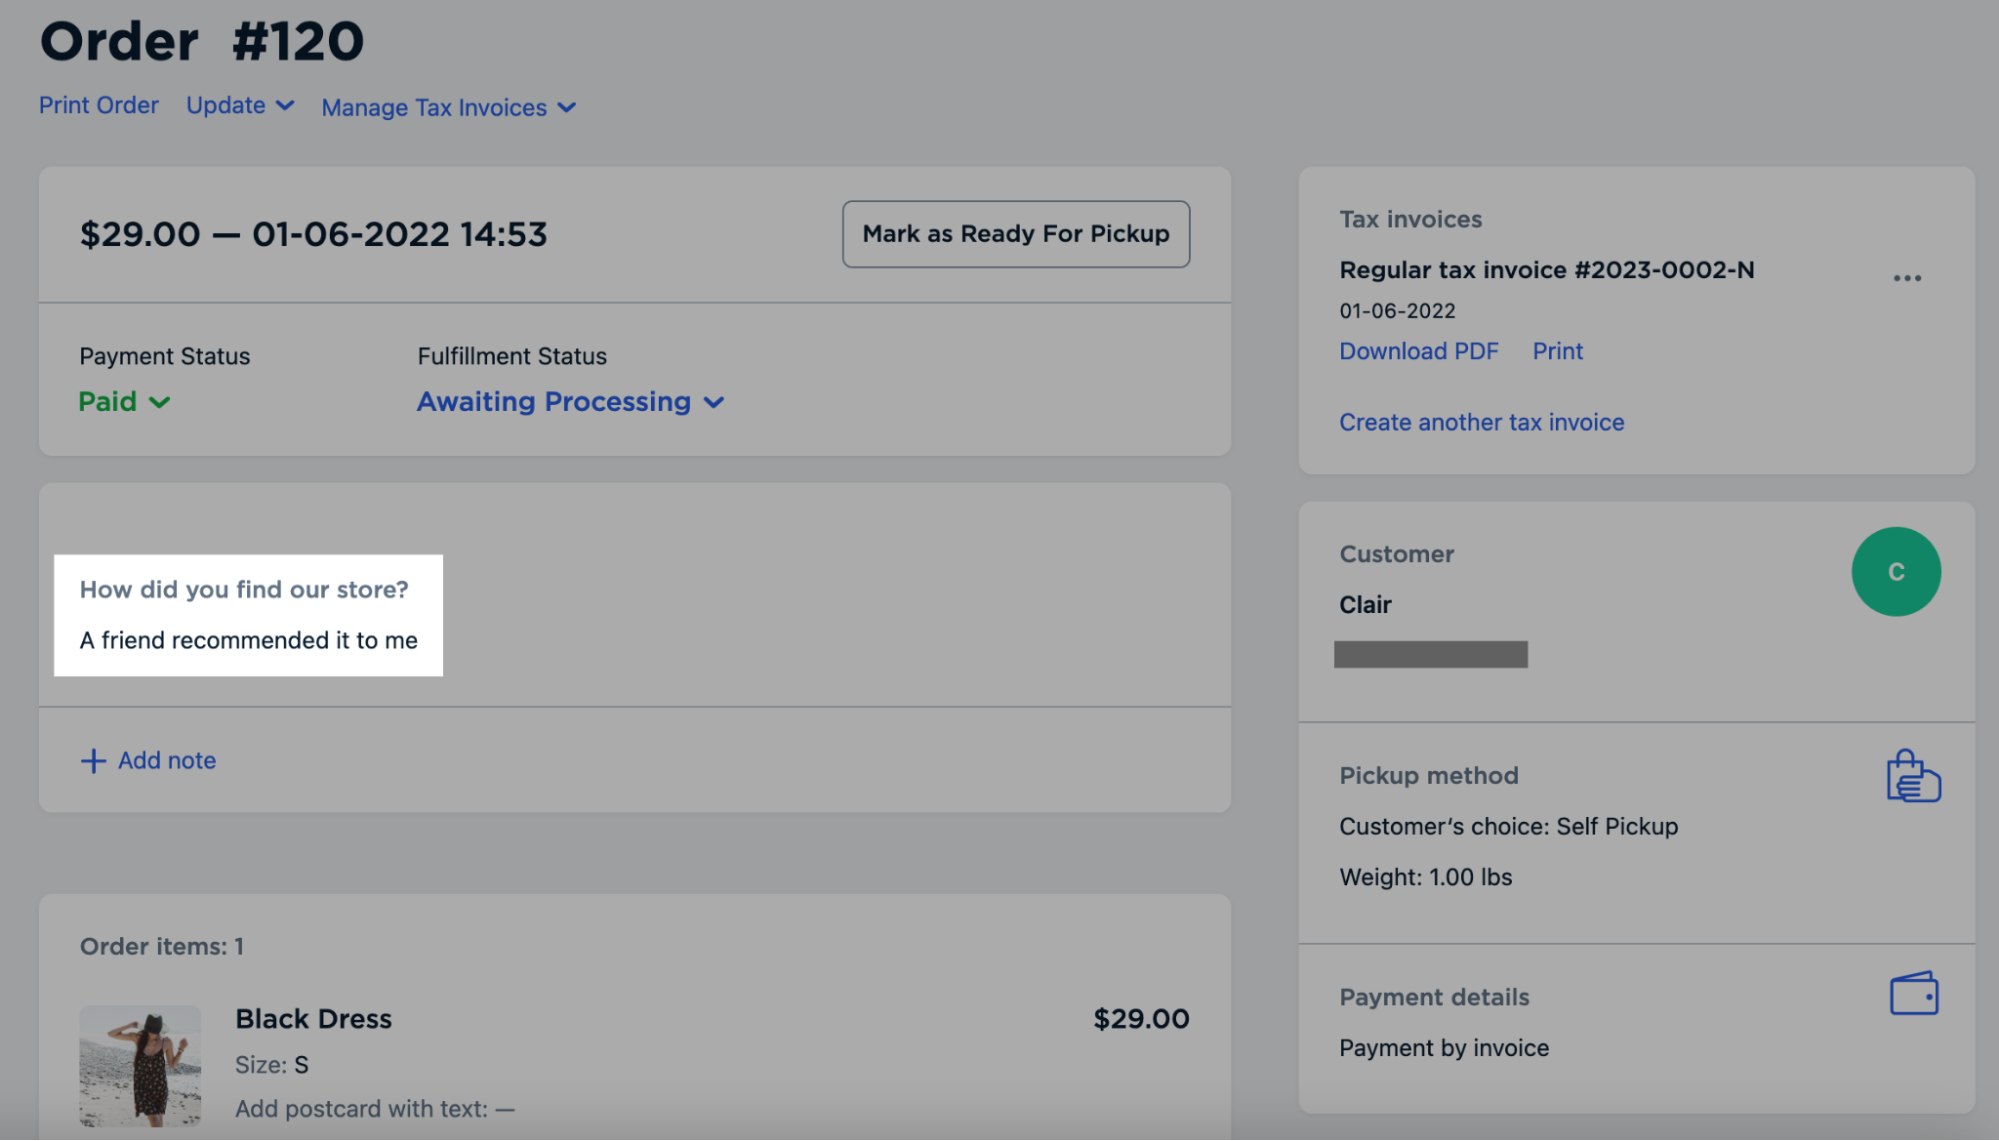
You can always access the data that customers submit via custom checkout fields in the order details in your store admin. Custom field data can appear in the payment details block of the order details, as well as in the order comments, customer details, or shipping/pickup blocks, depending on the option you choose when creating the field.
Field data is also available in the admin email notifications, plus in customer email notifications and/or in the order invoices if you enable these options for a particular field.
To access custom field data in the order details:
- From your store admin, go to My Sales → Orders.
- Click on the order to open it.
- Find field data in the corresponding order details block: