Adding Cookie Notification to your ecommerce site
Cookies are small text files stored in a browser of a website visitor that include information on pages a website visitor opens. Some cookies can collect data from different websites and then display specific content or adverts for the website visitor.
Privacy nowadays is a crucial issue on the internet, and laws that regulate the use of cookies exist (or are being developed) in many countries. Probably, the most well-known is the EU “Cookie Law”. According to it, websites are required to ask their visitors for permission to use cookies. The EU “Cookie Law” regulations refer to websites for EU customers — so, basically, it can be any website in the world.
In your store, you can ask your store visitors for their permission to use cookies.
Enabling cookie consent banner in the Instant Site Editor
If you are using New-gen Instant Site, you can enable the cookie consent banner in the site Editor.
To enable the cookie consent banner:
- From your store’s admin, go to Overview → Manage Instant Site → Edit Site (or Website → Edit Site).
- Click Settings → Tracking & Analytics.
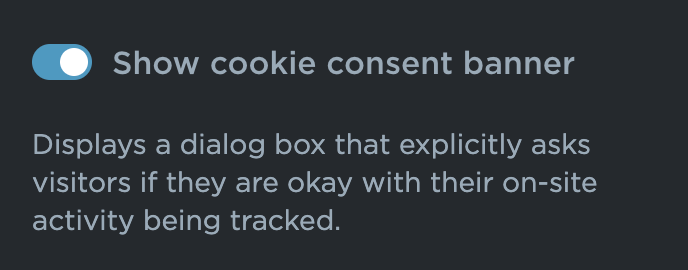
- Enable the Show cookie consent banner toggle:

Once enabled, the cookie consent banner will appear both on the front page of your Instant Site and on the pages of your store with the option to accept or decline (refresh the page to see it):

Those visitors who have clicked “Accept” — as well as those who clicked “Decline” — can always change their decision later on the My Account page in your store (this page/option is available both for customers who have their accounts in your store and for not registered visitors):

At the moment, you cannot change the text displayed in the cookie banner if you are using the New-gen Instant Site.
Enabling cookie consent banner in the store admin
If you’re using the old version of Instant Site, or if you need the cookie consent banner in your store only (e.g., you have added it to some other website), you can enable the banner in your store’s admin.
To enable the cookie consent banner:
- From your store’s admin, go to Settings → Legal.
- Scroll down to the Customers’ consent section.
- Enable the Cookie consent banner:

You can also turn it on in Settings → General → Tracking & Analytics by enabling the GDPR cookie consent banner.
Once enabled, the cookie consent banner will appear on the pages of your store with the option to accept or decline (refresh the storefront page to see it). It will also appear on the front page of your Instant Site (if you’re using its old version).
In case you enable the cookie banner in Settings → Legal, you can adapt the text displayed in the banner or add a different text. For this, you should edit the text label called Notice.TrackingConsent.description. Learn more about it in the article Changing the wording in your store.
Adding cookie notification to your custom site
If your store is added to a custom website (i.e., you do not use the free Instant Site as your e-commerce site) and you track users’ behavior there as well, you should add a separate cookie banner to the website. If a user disables cookie tracking in the store, it doesn’t automatically disable tracking on the website. Thus, you should add a cookie banner both to the store and the website. You can use these cookie plugins for some website builders:
Disabling cookie consent banner
If you want to turn off the cookie consent banner, make sure it is disabled both in your store’s admin and in the Instant Site Editor (if you are using New-gen Instant Site).
To disable the cookie consent banner in your store’s admin:
- From your store’s admin, go to Settings → Legal.
- Scroll down to the Customers’ consent section.
- Disable the Cookie consent banner.
Once you do that, the banner will no longer appear on the pages of your store and on the front page of your Instant Site (if you’re using its old version).
If you are using New-gen Instant Site and the cookie consent banner is enabled in the Editor, then disabling the cookie consent banner on the Settings → Legal page in your store’s admin is not enough. You need to disable the banner in the Instant Site Editor too.
To disable the cookie consent banner in the Instant Site Editor:
- From your store’s admin, go to Overview → Manage Instant Site → Edit Site (or Website → Edit Site).
- Click Settings → Tracking & Analytics.
- Disable the Show cookie consent banner toggle.
Once you do that, the banner will no longer appear on the front page of your New-gen Instant Site and on the pages of your store. If it still appears on the pages of your store, make sure the banner is also disabled in Settings → Legal.
In case you have added cookie notification to your custom site, follow the instructions for the specific tool that you use to disable the notification.