Enabling Google Analytics for your store
Connect your store to the free and powerful Google Analytics service to have access to lots of stats and get insights into how your existing and potential customers find and use your store. You can connect your store to Universal Google Analytics (using a “UA-” ID) or to brand-new Google Analytics 4 (using a “G-” ID that is now created by default).
Google Analytics 4 and Universal Analytics are completely different versions of Google Analytics. Unlike Universal Analytics that is based on sessions and pageviews, Google Analytics 4 is based on events and parameters. They have different sets of reports, and, while Universal Analytics has more built-in reports that can be set up out of the box, Google Analytics 4 allows you more flexibility with custom report templates.
You can set up either Google Analytics 4 or Universal Analytics. However, Google will begin sunsetting Universal Analytics in 2023.
Creating a Google Analytics account
If you already have a Google Analytics account, you can proceed to the next section and connect it to your store.
If you don’t have a Google Analytics account, follow these steps to create it:
- Go to https://marketingplatform.google.com/about/analytics
- Click Start for Free in the top right corner.
- Sign in to your Google Account or create a new Google/Gmail account.
- Click Start Measuring.
- Fill in your Account name.
- Under Account Data Sharing Settings, check the boxes next to the options that you want.
- Click Next to create a property.
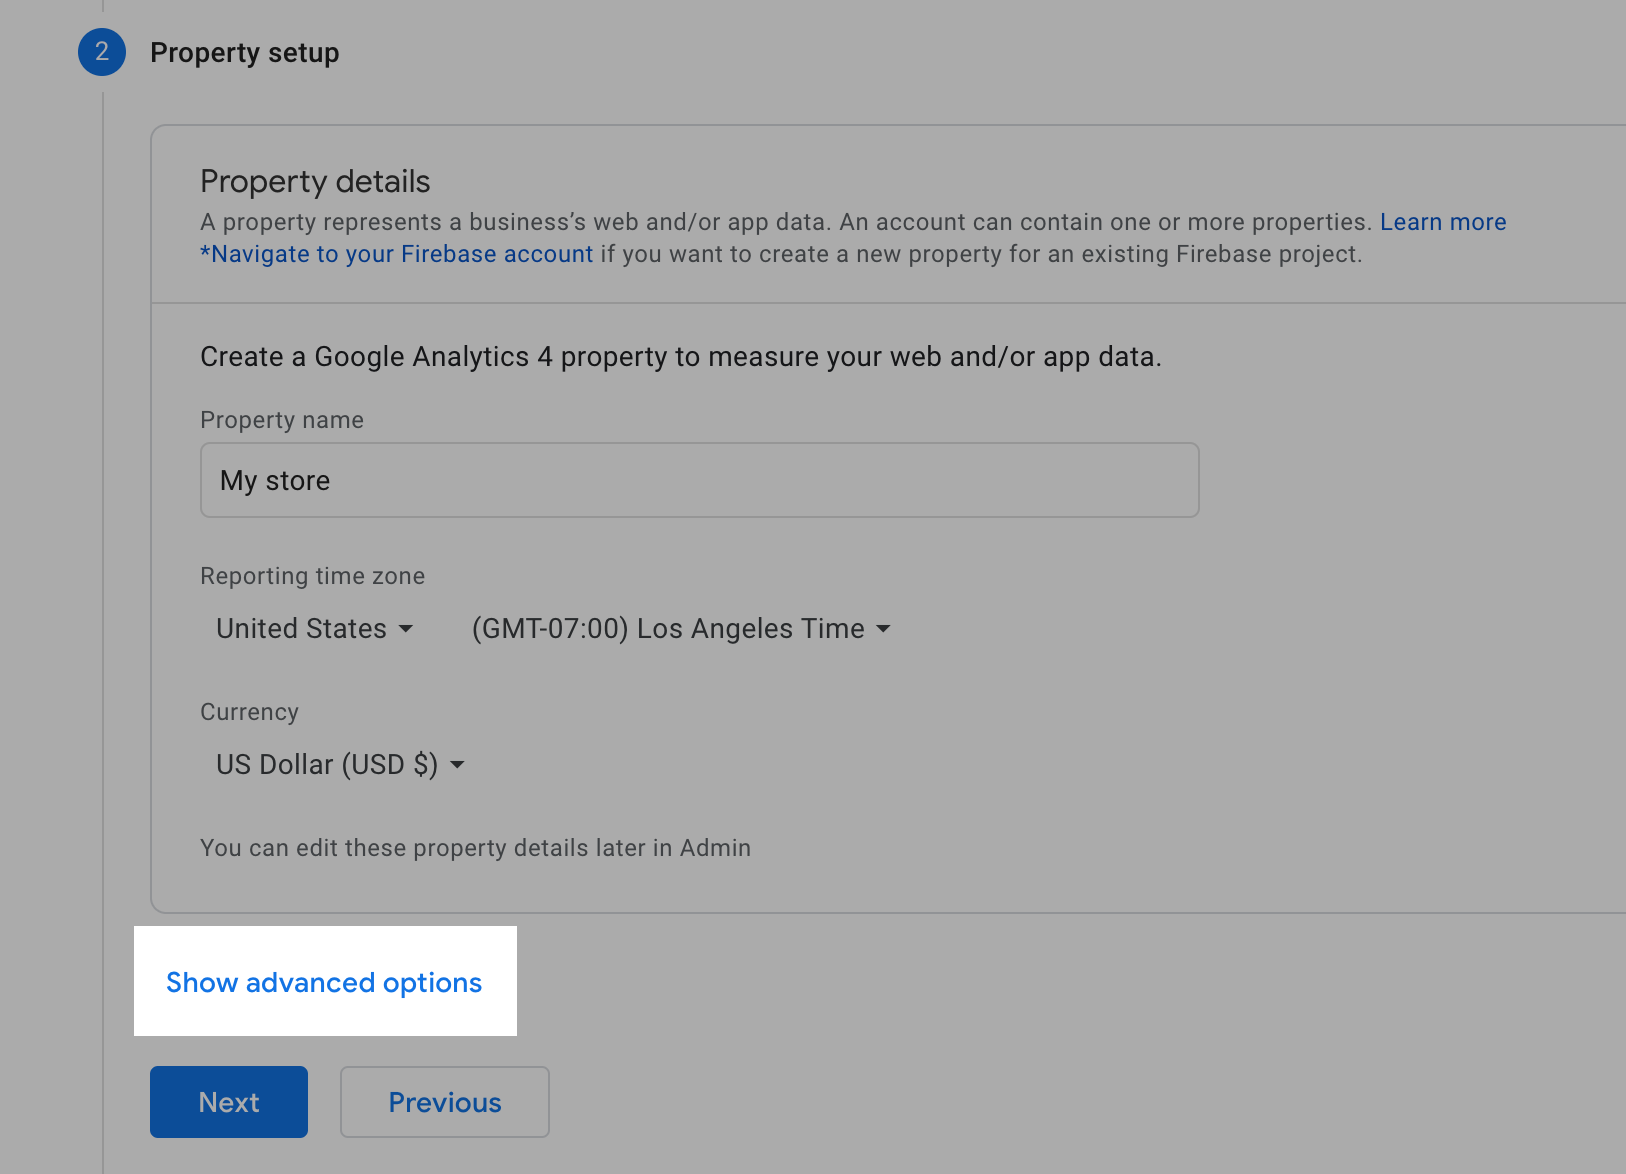
- Enter the property name (you can choose a name that suits you).
- Choose a reporting time zone and currency.
- (optional) By default, only a Google Analytics 4 property is created. If you want to create a Universal Analytics property (along with or instead of GA4), make sure to:
- Click Show advanced options:
- Enable the Create a Universal Analytics property toggle
- Enter your Website/Instant Site URL:

- Choose your option: Create both a Google Analytics 4 and a Universal Analytics property or Create a Universal Analytics property only
- Click Show advanced options:
- Click Next.
- Fill out data about your business, if you want.
- Click Create.
- Agree with the Google Analytics Terms of Service Agreement that opens.
- Google Analytics will generate a Measurement ID for you — copy it for later use:

In case you created both a Google Analytics 4 and a Universal Analytics property, you can always access your “UA-” ID on the Admin → Property Settings page of your Universal Analytics property. If you choose to create only a Universal Analytics property, you will see your “UA-” ID generated by the end of account creation.
You can also check with Google instructions on how to get started →
Now you have a Google Analytics property for your site and can copy the ID and add it to your store admin panel to link both. Read on to learn how.
Connecting your store to Google Analytics
It is really easy to connect your store to your Google Analytics account. You can choose to use a Google Analytics 4 (a “G-” ID) property or a Universal Google Analytics (a “UA-” ID) property.
In case you were using Universal Analytics in your store and now want to switch to Google Analytics 4, you need to create a GA4 property first.
To connect via a Google Analytics 4 property:
- Sign in to your Google Analytics account.
- In the menu on the left, click Admin.
- Choose your account and your GA4 property:

- Proceed to Admin → Data Streams.
- Click on the stream of your store/website:

- Copy the Measurement ID:
- From your store admin, go to Settings → General → Tracking & Analytics.
- Paste your Measurement ID in the Google Analytics ID field:
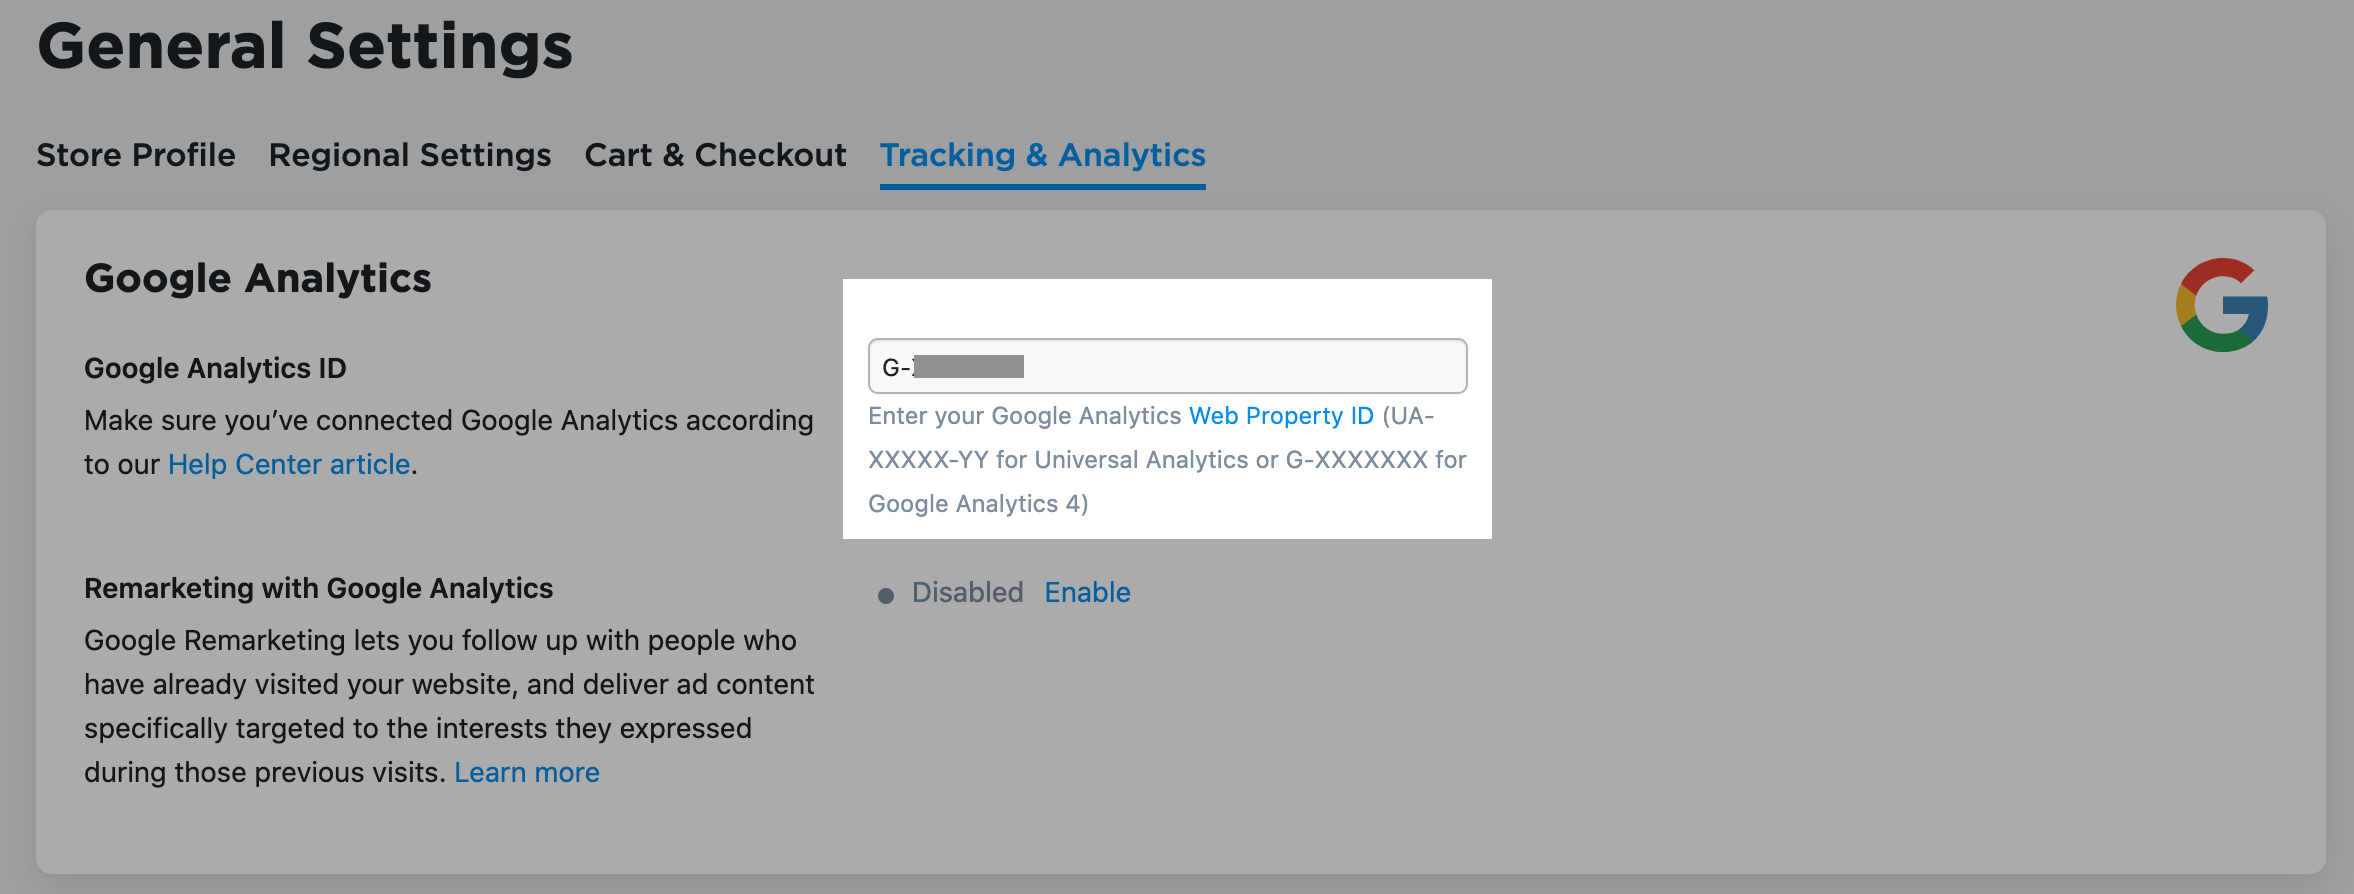
- Click Save or press Ctrl + S to save the changes.
That’s it. You’ve connected your store to Google Analytics 4.
Now the following events can be tracked:
- page_view — views of store pages
- view_item_list (with parameters) — views of product categories, favourites or search results
- view_item (with parameters) — views of any product details page
- search (with search_term parameter) — searches by keyword
- login (with method parameter) — logins into customer accounts
- add_to_wishlist (with parameters) — when someone adds a product to favourites
- add_to_cart (with parameters) — when someone adds a product to cart
- remove_from_cart (with parameters) — when someone removes a product from cart
- share (with method and content_id parameters) – when someone shares a product using share buttons
- begin_checkout (with parameters) — when someone begins checkout
- add_shipping_info — when someone chooses a shipping method and proceeds with checkout
- add_payment_info (with parameters) — when someone chooses a payment method and presses the “Place Order” button
- purchase (with parameters) — when someone places an order
You can find these events on the Events page in your Google Analytics account. If you click an event in the table, you will see a detailed report for this event. You can also mark events as conversions in this table so that they appear in the conversions report on the Conversions page, or create custom reports using events in Analysis → Analysis Hub. Events also appear in the Engagement section reports.
By default, the Measurement ID (the “G-ID”) is created for the new Google Analytics accounts. If you have already created an account that has only a Measurement ID and want to use a Tracking ID (the “UA-” ID), please, create a Universal Analytics property.
To connect via a Universal Analytics property:
- Sign in to your Google Analytics account.
- In the menu on the left, click Admin.
- Choose your account and your UA property:
- Proceed to Admin→ Property Settings:

- Copy the Tracking ID:

- From your store admin, go to Settings → General → Tracking & Analytics.
- Paste your Tracking ID in the Google Analytics ID field:

- Click Save or press Ctrl + S to save the changes.
- Open your Google Analytics account again.
- Click Admin.
- Click Ecommerce Settings under the View column:

- Switch the toggle to ON under Enable Ecommerce and then under Enable Enhanced Ecommerce Reporting:

- Click Save.
That’s it. You’ve connected your store to Universal Google Analytics and enabled the Ecommerce Tracking in your Google Analytics settings.
Now the following events will be tracked:
- Views of any store page
- Views of product pages (ID of the product viewed in the store, its name, category and price)
- Adding product to shopping cart (IDs of products added to the cart, their names, prices, quantities and categories)
- Checkout: a shopper starts checkout
- Checkout: a shopper enters shipping address
- Checkout: a shopper chooses shipping method
- Checkout: a shopper chooses payment method
- Purchase (name of the store the purchase came through, the order number, order total, tax amount, shipping cost, coupon code if entered)
Note that the first results in Google Analytics reports will appear in about 24 hours.